I was standing in my kitchen, mid‑December, with a half‑baked batch of bland sugar cookies staring back at me from the cooling rack. The air smelled like stale pine needles and burnt sugar, and I could hear the faint hum of my neighbor’s Christmas lights flickering in sync with the ticking clock. I’d just tried a “quick fix” recipe that turned out as flat as a forgotten snowflake, and my sister dared me to make something that would actually make the kids gasp, “Whoa, is that magic?” I accepted the challenge, rolled up my sleeves, and dove headfirst into a pantry raid that felt more like a treasure hunt than a grocery run. The result? A cookie that looks like a festive confetti explosion and tastes like a winter wonderland wrapped in buttery clouds.
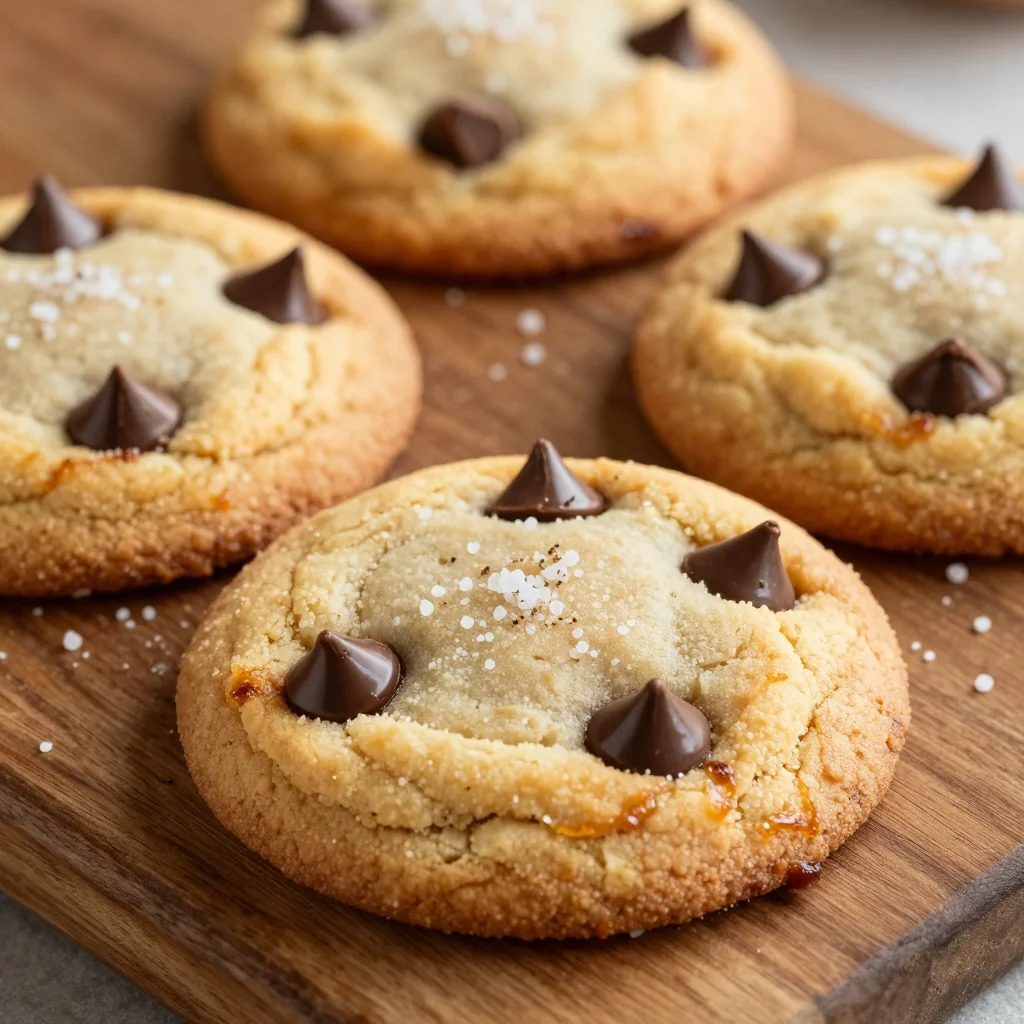
Picture this: the moment the cookies slide out of the oven, a warm, sugary aroma erupts, mingling with the faint scent of vanilla and a whisper of buttered caramel. The edges are crisp, snapping like fresh ice under a skate, while the centers stay soft and chewy, almost melt‑in‑your‑mouth soft, like a secret hug from Santa himself. When you bite into the frosting, it spreads like silky snow, brightened with just the right amount of festive sprinkles that pop with a satisfying crunch. The colors are vivid, the texture is a delightful contrast of smooth and crumbly, and the taste is a perfect balance of sweet, buttery, and just a hint of tang from the cream cheese frosting.
What makes this version truly stand out is the little tricks I’ve collected over years of holiday baking failures and triumphs. Most sugar cookie recipes either get the texture wrong—ending up too hard or too cakey—or they lack that festive sparkle that makes you want to share them on every social feed. I’ve cracked the code on achieving that perfect chew, the right amount of spread, and a frosting that stays glossy without cracking, even after a day in the fridge. And I’m not just talking about adding a dash of food coloring; I’m talking about a secret ingredient that lifts the flavor profile into a whole new dimension.
Let me walk you through every single step — by the end, you’ll wonder how you ever made any other cookie during the holidays. Okay, ready for the game‑changer? This next part? Pure magic. I dare you to taste this and not go back for seconds. If you’ve ever struggled with flat, flavorless cookies, you’re not alone — and I’ve got the fix. Stay with me here — this is worth it.
What Makes This Version Stand Out
- Flavor Explosion: The combination of real butter, vanilla, and a tangy cream cheese frosting creates a layered taste that feels like a holiday party in your mouth.
- Texture Harmony: A crisp edge meets a pillowy center, thanks to the precise balance of flour, butter, and a touch of milk.
- Simplicity Meets Sophistication: All ingredients are pantry staples, but the technique elevates them to gourmet status without any fancy equipment.
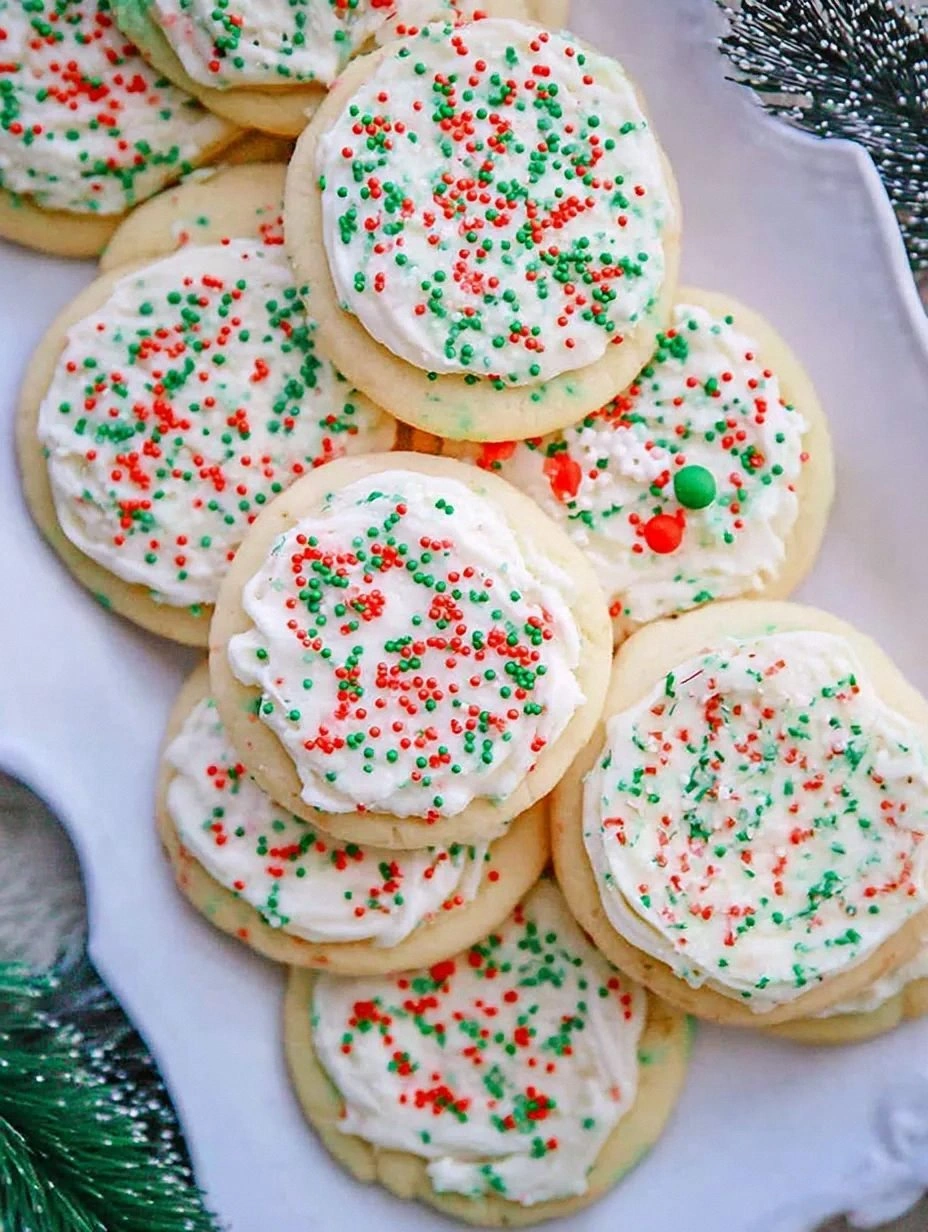
- Festive Visuals: Rainbow sprinkles (funfetti) are folded into the dough, and the frosting is swirled with red and green hues for that instant Christmas vibe.
- Crowd‑Pleaser Factor: Even the pickiest eaters (yes, the toddlers) can’t resist the sweet aroma and the colorful finish.
- Ingredient Quality: Using unsalted butter and high‑quality cream cheese ensures a clean, buttery flavor without any unwanted salty aftertaste.
- Method Mastery: Chilling the dough and a gentle bake at a moderate temperature prevent spreading and keep the cookies thick.
- Make‑Ahead Magic: The cookies store beautifully, and the frosting can be prepared a day ahead, saving you stress on the big day.
Inside the Ingredient List
The Flavor Base
All‑purpose flour is the backbone of any good cookie, providing structure while allowing the butter to coat each crumb. I use 2 cups of unbleached flour because its protein content gives just the right chew without turning the cookie into a dense biscuit. If you skip the flour or use cake flour, you’ll end up with a cookie that crumbles like dry snow. Swap tip: For a gluten‑free version, substitute with a 1:1 gluten‑free flour blend, but add a tablespoon of xanthan gum to mimic the elasticity.
Granulated sugar does more than sweeten; it caramelizes slightly during baking, lending that golden‑brown edge that smells like a fresh‑baked caramel apple. Using a mix of superfine sugar can give an even softer crumb, but regular granulated works perfectly and is easier to find. If you’re watching sugar, you can cut it by a quarter, but expect a less pronounced caramel flavor.
The Texture Crew
Butter is the star of the show here. I insist on unsalted, high‑fat butter (at least 80% butterfat) because it creates a rich, buttery mouthfeel and helps the cookies spread just enough to get those crisp edges. The butter should be softened to room temperature, not melted, otherwise the dough becomes too soft and the cookies will flatten. Pro tip: Chill the butter cubes for 15 minutes before creaming; this creates tiny air pockets that lead to a lighter texture.
Eggs act as a binder and add moisture. One large egg is enough to hold everything together while keeping the dough supple. If you’re allergic, a flax egg (1 tbsp ground flaxseed + 3 tbsp water) works, though the texture will be slightly denser.
Baking powder and baking soda are the leavening duo that gives the cookies a subtle lift. Baking powder creates a gentle rise, while a pinch of baking soda neutralizes the acidity from the cream cheese frosting, balancing the flavor. Skipping them results in a flat, dense cookie that lacks that airy bite.
The Unexpected Star
Rainbow sprinkles—yes, the funfetti—are folded into the dough, not just used as a topping. This infuses the cookie with tiny bursts of color and a faint sugary crunch throughout the bite. If you want a more subtle look, use pastel confetti or even crushed peppermint candies for a minty twist. The secret ingredient that makes these cookies sing is a splash of vanilla extract, which amplifies the buttery notes and adds depth.
The Final Flourish
The frosting is a cream cheese‑butter blend that stays soft and spreadable. Using full‑fat cream cheese ensures a tangy richness that cuts through the sweetness, while the butter adds silkiness. Powdered sugar sweetens without graininess, and a touch of milk helps achieve a spreadable consistency. For the holiday hue, add a few drops of red and green food coloring; the colors stay vibrant because the frosting is thick enough to hold them without bleeding.
Everything's prepped? Good. Let’s get into the real action…
The Method — Step by Step
Preheat your oven to 350°F (175°C) and line two baking sheets with parchment paper. While the oven heats, give yourself a mental high‑five because you’re already one step ahead of the chaos that usually follows holiday baking. The parchment ensures the cookies don’t stick, and the heat will be even, preventing any burnt bottoms. Pro tip: Place a second rack in the middle of the oven for a second sheet later on, saving you time.
Kitchen Hack: If you’re short on parchment, lightly grease the sheet and dust with a teaspoon of flour; this creates a non‑stick surface and adds a subtle crispness.In a large bowl, whisk together the flour, baking powder, baking soda, and salt. This dry mix should look like a fine, uniform powder; any lumps will become pesky pockets of dense dough later. I like to sift the mixture twice—once to aerate and once to catch any stray bits of butter that might have escaped earlier. The scent of fresh flour should fill the kitchen, reminding you that you’re about to create something truly special.
In a separate bowl, cream the softened butter and granulated sugar together until the mixture is light, fluffy, and pale yellow—think sunrise on a snow‑covered field. This step is where the magic begins; the air you incorporate now becomes the tiny pockets that keep the cookie tender. Add the egg and vanilla extract, beating until fully incorporated. Watch Out: Over‑mixing at this stage can cause the butter to melt, resulting in a greasy dough that spreads too much.
Watch Out: If the butter is too warm, the dough will become sticky; chill for 5 minutes before proceeding.Gradually add the dry ingredients to the wet mixture, mixing on low speed or with a spatula until just combined. You’ll notice the dough coming together in a shaggy, slightly sticky mass—this is exactly what we want. Over‑mixing can develop gluten, making the cookies tough. Once combined, fold in the rainbow sprinkles, distributing them evenly without crushing them.
Turn the dough onto a lightly floured surface and knead gently—just enough to bring it into a smooth ball. Then, flatten the dough into a disk, wrap it tightly in plastic, and chill for at least 30 minutes. This chilling step is the secret to keeping the cookies from spreading too much and giving them that perfect, thick bite. I like to set a timer and use that time to prep the frosting.
While the dough chills, make the frosting: beat the softened cream cheese and butter together until smooth and creamy. Gradually add powdered sugar, one cup at a time, beating until the frosting is light and fluffy. Add vanilla extract, then split the frosting into two bowls. Tint one bowl with a few drops of red food coloring, the other with green. The colors should be vibrant but not overpowering; remember, a little goes a long way.
Kitchen Hack: If the frosting is too thick to spread, whisk in a teaspoon of milk at a time until you reach a pipe‑able consistency.Remove the chilled dough and roll it out to about ¼‑inch thickness on a lightly floured surface. Use a festive cookie cutter—think stars, trees, or classic circles—to cut out shapes. Place the cutouts on the prepared baking sheets, spacing them about 2 inches apart. The dough should hold its shape; if it sticks, lift with a thin spatula and place it back gently.
Bake the cookies for 10‑12 minutes, or until the edges turn a light golden brown and the tops are just set. The scent at this stage is intoxicating—imagine a blend of fresh‑baked sugar, butter, and a whisper of vanilla. When you see the edges start to pull away from the parchment, that’s your cue to pull them out. Let the cookies cool on the sheet for 5 minutes before transferring to a wire rack; this prevents them from breaking.
Once completely cool, spread a generous layer of the colored frosting on each cookie using a small offset spatula or the back of a spoon. Sprinkle extra rainbow confetti on top for that final festive pop. Let the frosting set for about 15 minutes—this helps it firm up just enough to handle without smearing.
That’s it — you did it. But hold on, I’ve got a few more tricks that'll take this to another level…
Insider Tricks for Flawless Results
The Temperature Rule Nobody Follows
Always bring your butter and egg to room temperature before mixing. Cold butter will create pockets of dough that don’t blend, leading to uneven texture. Warm ingredients emulsify better, giving you a smoother dough that spreads evenly. I once tried using melted butter to save time and ended up with a flat, greasy cookie that resembled a pancake. Trust me, the extra few minutes to let everything sit out is worth the difference.
Why Your Nose Knows Best
When the cookies are in the oven, listen for the subtle “sizzle” as the butter starts to caramelize. That sound, combined with a faint sweet aroma, signals the perfect moment to start checking for doneness. If you rely solely on time, you risk under‑ or over‑baking. I’ve learned to trust my nose more than the timer—if the scent feels too sweet, pull them out a minute early.
The 5‑Minute Rest That Changes Everything
After baking, let the cookies rest on the sheet for exactly five minutes before moving them. This short rest lets steam escape, preventing the bottom from getting soggy while allowing the interior to set. Skipping this step can cause the cookies to crumble when you try to frost them. A friend once tried to frost hot cookies and ended up with a melted frosting disaster—lesson learned.
Frosting Consistency Hack
If your frosting becomes too soft after sitting out, whip in a pinch of cornstarch. It stabilizes the mixture without altering the flavor, keeping the frosting pipe‑ready for decorative swirls. I discovered this trick when my frosting started to ooze off the spoon during a holiday party, and a quick whisk of cornstarch saved the day.
The Secret Sprinkle Shield
To keep sprinkles from melting into the frosting, lightly dust the top of the frosting with a thin layer of powdered sugar before adding the sprinkles. This creates a barrier that preserves the crunch and vibrant color. I tried adding sprinkles directly once, and they turned into a sugary glaze—definitely not the look I was going for.
Creative Twists and Variations
This recipe is a playground. Here are some of my favorite ways to switch things up:
Peppermint Party
Swap the rainbow sprinkles for crushed peppermint candies, and add a few drops of peppermint extract to the frosting. The result is a cool, minty bite that pairs perfectly with hot cocoa. Kids love the crunch, and adults appreciate the festive flavor.
Chocolate Delight
Add ¼ cup of cocoa powder to the dry ingredients and use chocolate chips instead of sprinkles. Frost with a dark chocolate ganache instead of cream cheese for a richer, more decadent version. This variation works well for a holiday movie night.
Citrus Sparkle
Incorporate zest of one orange into the dough and replace the vanilla extract with orange extract. Tint the frosting with a bright orange hue and sprinkle candied orange peel on top. The citrus notes brighten the sweet profile and add a sophisticated twist.
Nutty Noel
Fold in ½ cup of finely chopped toasted almonds or pecans into the dough. Top the frosting with a drizzle of caramel and a few whole nuts for added crunch. This variation adds texture and a buttery nut flavor that feels luxurious.
Vegan Velvet
Replace butter with coconut oil, use a plant‑based cream cheese alternative, and swap powdered sugar with a vegan confectioners’ sugar. The texture remains soft, and the flavor stays indulgent—perfect for guests with dietary restrictions.
Storing and Bringing It Back to Life
Fridge Storage
Place the cooled cookies in an airtight container, layering parchment between each layer to prevent sticking. Store in the refrigerator for up to 5 days. The frosting stays firm, and the cookies retain their chewiness. Before serving, let them sit at room temperature for 15 minutes to soften the frosting.
Freezer Friendly
For longer storage, freeze the un‑frosted cookies on a baking sheet, then transfer to a zip‑top freezer bag. They’ll keep for up to 3 months. When you’re ready, thaw overnight in the fridge, then frost as usual. The texture remains pristine because the dough was chilled before baking.
Best Reheating Method
To revive day‑old cookies, preheat the oven to 300°F (150°C), place the cookies on a parchment‑lined sheet, and add a tiny splash of water (about a teaspoon) to the tray. The steam gently re‑moisturizes the interior while the outer edge crispes up again. In just 5‑7 minutes, you’ll have cookies that taste as fresh as the day they were baked.